Category: Theory and Concepts

  • Landscape and the City

    !!To be developed with documentary

    Since the very beginning of photography, the city has provided opportunities for the photographer: landscape and other subject matter.

    Detachment

    Daguerre’s. ‘View boulevard du temple’. First example of photograph of a person. Only rendered because he must have remained relatively still to have his shoes shined.

    Talbot’s views of Paris.

    “The images of Paris remain passive and mute, and establish not so much the tourist eye-view, hungry for sights to record, as one that was looking for things to record… his London images, for example Nelson’s Column (1843), keep the city at a distance and follow the eye in its way within the urban world.”
    (Clarke, 1997, p.77)

    Eugene Atget

    Social documentary

    John Thomson Street Life in London

    Jacob Riis How the other half lives.

    Brassai

    Cities within cities

    A recurring line of investigation is that of the city, not just as one complete interconnecting  unit, but layers of different cities within cities. Sometimes these elements are briefly exposed to one another, but often they are designed to restrain their inhabitants from uncomfortable contact with each other. Eg film In Time.

    Paul Seawright.    Invisible Cities.


    1.9: Visual research and analysis – social contrasts

  • Designing a project brief

    Project briefs are of different types and allow different levels of negotiation and artistic freedom.

    (what follows is from the Course Manual and will be revisited in Assignment 5)

    Commercial (client-led) briefs
    Any engagement with commercial photographic enterprise will involve a brief of some kind. This may be in the form of a legally binding contract, or it may be something much more informal. In a commercial context, a brief will usually be a document that is the conclusion of a verbal or email discussion about what the client is hoping to achieve from a shoot – i.e. what they want you to communicate with your photographs – and, importantly, what the intended outcome will be. Will the photographs be used in a book, for example? Or on a website? This second aspect has important ramifications in relation to the size, format and quality of files they are expecting, and may influence your choice of equipment. A brief written by a client may be fairly openended or it may include a list of specific products or subjects that need to be photographed, including aspect ratio and crop. It may be something prescriptive, to be referred to throughout the shoot, or something more abstract that you will respond to photographically using your own initiative.

    A brief should align the expectations of the clients with a realistic outcome on the part of the photographer. Whether you’re being paid generously for your services or doing a job as a favour, it is extremely important to have, in writing (email is fine), an agreement that clearly identifies the needs of the client and what you agree to supply them with, in order to prevent at best disappointment, or at worst, being sued. A brief should include the following:
    • A summary of the project and general purpose of the photographs.
    • What the photographs should communicate.
    • A list of any specific shots the client would like.
    • The amount of time that you will spend on the shoot (hours? days?) and timings.
    • The number of images you will supply to the client, and whether they will be processed or unprocessed.
    • Your fee, as well as/including any expenses you will incur.
    • Whether (if working digitally) your time for file processing is included or, if not, how this File format and size of processed images (and possibly colour profile and bit-depth).
    • Permission for using your photographs from the shoot: how will you permit the client to use your images, and for what period of time?
    • Whether you will administer Model and/or Property Release Forms.
    • Details of any other parties involved in the shoot, e.g. models/subjects.
    People who are in a position to commission photography may do so on a regular basis and, if so, will be expert in drawing up a brief and/or contract; other, just as valuable, clients may not. It may be down to you to put into writing their verbal description of what they want you to do. Forming a brief should be a negotiation between you and the client, and the specifics will depend on many factors, including your own particular workflow. The important thing is to make
    sure all parties are content with all aspects of the brief before commencing a shoot.

    [Although briefs are not discussed specifically, a wealth of related information can be found in Beyond the Lens: Rights, Ethics and Business Practice in Professional Photography, London: The Association of Photographers]

    Self-authored briefs
    This and subsequent courses you may study with OCA will ask you to set your own assignment briefs. The purpose of this is to allow you more creative freedom, to help you become a more independent student, and to encourage you to think of yourself as a creative, independent practitioner pursuing your own interests and working on personal projects, as opposed to making work within the confines of a prescriptive art and design course.
    Developing the ability to articulate your ideas for projects or enterprises is an essential skill for professional practice, within both commercial and art-based practice. For instance, you may identify a potential business opportunity to collaborate with an organisation that might be able to commission you, and approach them to propose a project. Or you may have an idea for a documentary or fine art project and need to apply for funding. In either case, you’ll need to
    write a brief. (This is explored further at Level 3.)

    A self-directed brief, particularly one conceived within an arts context (e.g. an academic environment such as OCA, or a proposal to a funding body such as the Arts Council – www. artscouncil.org.uk) will include some, but not necessarily the majority of the points listed above. You’ll still need to discuss money, in particular your justification for any special resources you may require. Appropriately contextualising the project within a critical framework rather than an economic one will be the most significant difference between the two types of brief. If you’re requesting funding or support for production, for an exhibition or publication, or for an artist’s residency, you must be able to convince whoever writes the cheques that you’re conversant with the subject you wish to research and that you have the ability and commitment to complete
    the project.

    Unlike a commercial brief, a self-directed brief is not a rigid plan but a more organic document, which you’ll appraise and update as you go along. This is certainly the case with the selfdirected projects you’ll propose whilst studying with the OCA.

  • Territorial Photography

    Read Snyder’s essay ‘Territorial Photography’ from W.J.T Mitchell ed 2002 Landscape and Power. Summarise Snyder’s key points.

    Snyder’s argument:

    In the 1830s and 1840s photography was dominated by wealthy upper class photographers trained within a fine art tradition. Their work was personal and intended for a small audience as there were no means for mass production. It aimed to express the photographer’s feelings towards the landscape depicted.

    But from the mid to late 1850s a growing middle class clientele created a large and definable market for landscape photographs. This coincided with/was a motor for development of mass production techniques. As the costs of photography reduced, the photographers themselves increasingly came from the middle classes. Prints were increasingly sold by print houses near to sites of tourist interest, and other commercial outlets.

    This led to a change in the understanding and techniques of photography itself. Middle class clients were interested in technological progress and wanted photographs that looked machine made with high degree of detail. Tendency towards glossy sepia. Photographs are seen to be disinterested reports.

    Issue: ‘how to make a picture that was resolutely photographic yet, at the same time, beautiful or stunning …but that nevertheless could be convincingly experienced as aconventional, a product of scientific laws and photographic craft.’ 

    Carleton Watkins      Google Images

    ‘entrepreneur whose job was to record pre-existing scenes in a thoroughly disinterested manner’

    Watkins seeks to harmonise landscape with industrial progress – grand, sublime and quiet – a West American Eden. He produced large 20″ x 24″ negatives of very detailed views of Yosemite Park, Pacific Coast and sparsely settled areas of Utah and Nevada. The images of Yosemite emphasise accessibility and grandeur. Those of the Pacific coast depict it as unspoiled and unspoilable. There is no questioning  of whose land it was, or what happened to the earlier native American settlers on the land.

    William Henry Jackson  Google images

    also picturesque-sublime. Reconfirm beliefs about America landscape as a ‘scene of potential habitations, acculturation and exploitation’.

    Timothy O-Sullivan                               Google images

    O’Sullivan was not subject to commercial pressures.  His pictures were antipicturesque showing the West as ‘a boundless place of isolation, of contrasts of blinding light and deep, impenetrable shadows’ – a ‘bleak, inhospitable land, god-foresaken, anaesthetising landscape’.  Despite their detail, his images are not primarily scientific and ‘objective’, but often carefully constructed eg recording his own foot prints and carefully selecting particular elements of a view. Figures are present but have no clear role. He was rejected in his time till rediscovered by Ansel Adams in 1939.

    Next, find and evaluate two photographs by any of the photographers Snyder mentions, but not specific examples that he addresses in the essay. Your evaluation (up to 250 words for each) should reflect some of the points that Snyder makes, as well as any other references. (Both the images below are under Creative Commons license)

    Watkins Evaluation of Cathedral Rocks

    This image makes the tock fill the frame, placing it on the centre line and looking upwards. The light is soft and inviting to a gentle mysterious mistiness at the summit. Shadow lines are also soft – rather like an ancient bone that adds the mystery of weathered age. The trees are quite large and invite the viewer to look up – as if inviting to climb. The curve of the trees around the bottom of the image suggest possibilities of a hidden way up behind the mountain.

    O’Sullivan  South Side of Inscription Rock

    File:Timothy O'Sullivan, South side of Inscription Rock, New Mexico, 1873.jpg

    This image of a similar subject is altogether more stark and forbidding. The rock is placed off-centre, showing the flat landscape beyond. The light is harsh with defined shadows to emphasise the sharp razor-like lines in the rock. It is absolutely clear there is no way up. The sky and sepia colour are burning hot – like a scene on the moon. The shrubs and small trees in the foreground are dwarfed – but note the semi-cropped larger tree on the left.

  • Journeys

    ‘Going North’

    ‘Going North’ montage

    For this assignment I wanted to explore a journey that was likely to be ‘unpicturesque’ – one that was characteristic of many journeys on busy roads through rather boring countryside. I travel a lot for my work – currently in Africa and so have photographed many ‘journeys’ – and am planning to review these in a review of ideas about ‘safari’ for Assignment 4. But for this assignment, based on the discussions in the course materials and my work on ‘Christmas 2014’, I wanted to focus closer to home and try something a bit different.  I have become interested in some of the ideas from ‘New Topographics’ – Lewis Baltz‘s aim to look for things that were most unremarkable, presenting them in as unremarkable a way as possible to ‘appear objective’ and not show a point of view. Also to show how we use and construct the landscape to make our busy lives more convenient. I am also interested in the different effects of different ways of making the image – should they be sharp and studied with a political message as in Nadav Kander‘s work on China and Paul Graham‘s Great North Road, or deliberately blurred and out of focus to convey a subjective mood as in Robert Frank’s Americans and Chris Coekin‘s work, or even more uncontrolled as in mobile phone images.

    I started by experimenting a bit with my mobile phone on train  journeys. Building on some earlier images of train journeys in London (see Docklands Journey). I used my iPhone to take images of the train journey home from London to Cambridge as we went past open fields, suburban allotments and warehouses and included some images of the passengers (See London to Cambridge) On this iPhone it is not possible using the normal camera to control shutter speed – the focus is on the actual image. These gave me very much a feeling of movement and going through the suburban landscape. I also like some of the reflections in the windows. But an aesthetic I need to think about a lot more – what actually creates an effect/mood and what is just snapshot and what exactly am I trying to convey – the passage of time, isolation of commuters, ordinariness of countryside, specific landmarks of human intervention or maybe something new and less cliche?

    I also experimented with walking – the idea of a disturbing inward journey. On a walk along the River Holme I photographed light and human made objects and litter along the way. (See HolmeWalk  images) I was interested in how some of these things became quite disturbing – footprints in mud, hanging ropes like dead birds, electricity boxes like nestboxes. Plastic tubes like underground snakes. I photographed in colour and then converted to high contrast black and white in Lightroom, but without any further Black and White manipulation because I wanted the images to have an element of accident, not too contrived. I am planning to use these images in my Book Design course to illustrate the poem ‘Jabberwocky’ as a scary fable. This type of approach is also something I want to explore further – inspired by some of the images of Japanese photographers like Daido Moriyama and Hiroshi Sugimoto.

    For the actual assignment on this course, I chose a two and a half hour journey up the A1 from Cambridge to Barnsley to take my assessment materials to OCA. I had experimented with shutter speed and lenses on my various journeys in Africa. In order to maintain the more ‘objective’ and random element and also not to spend all my time fiddling with camera settings to free me to focus on the image itself, I decided to take two series each using a different lens and format,  but within each series using the same approach and then decide which series is most interesting and select the images:

    1) Going North – my 28mm wide angle fixed lens in order to give me the widest choice of composition, including some dramatic distortion, in landscape format. Using shutter speed priority on a fast shutter speed of 1600.

    2) Going South – my 100mm telephoto in portrait format to give a much flatter image and using a slower shutter speed.

    I looked at the route on Google Street View in advance. But as the road is extremely long and the interest in my images would be from traffic and events along the route rather than ‘views’ I did not pursue this area of exploration far. I used a standard map during the journey itself.

    I was interested in using photography as a way of exploring and discovering the road, rather than shooting to a predetermined formula (following photographers like Kander and Baltz). I took over 1000 images going up and 500 coming back because it was very difficult to predict any ‘decisive moment’ so I shot images at frequent intervals whenever I saw anything potentially interesting and/or characteristic of a particular stretch of road. I found the wide angle fast shutter speed images much more interesting – partly but not only because of the interestingly dreadful heavy rain for most of the journey and the feeling of potential risk that this added. Though it was difficult to actually shoot near collisions without provoking them! The dramatic gloomy sky was also a constant until very nearly at the end of the journey, framing things like water towers and pylons. The images themselves are mostly very sharp and some are quite like those of Paul Graham, rather than Coekin.

    The big challenge was then what to make of all the images and ways in which the photographic process had made me constantly aware of new things. I started by thinking of selecting 12 images as a montage for 12 stages of the journey (See the different pages of square thumbnails in Going North on Zemniimages website). But I was not sure if that would be cheating. If I was to select 12 images I still needed to think exactly what I was trying to say – choosing deadpan images that showed the sameness of much of the countryside? or the dramatic cloud breaks? or the awful traffic?

    In the end as I reread the material for this part of the course, I decided to experiment with typological ideas. I had started to notice the many different signs – particularly industrial estates trying to sound rural like ‘Honeypot Lane’, ‘historic market towns’ and the variety of traffic signs. I could have taken this typological approach to start with, but then the images could have become too studied and I would have stopped the feeling of journey as exploration. In the end, looking through what I found to be some of the most interesting images I noted that they were often based on colour. So I thought of doing a post-selection of red vehicles – an after-the-event  I-Spy red cars  game used to keep children happy on a boring journey.

    I think the images are best displayed as a montage of square images so that they can be seen all at once. For a slideshow I would have selected rather different images that told a clearer narrative or anti-narrative. I could have cropped and processed the images in a more considered montage with aesthetic dynamic diagonals and abstract colour patterns. But I think that would have negated the rather random nature of the images and my ambivalent feeling about the journey. On the one hand it was pretty long, tiring and at many stretches boring. The greys and plastics of much of the ‘architecture’ and the feeling of so many people busily going somewhere but nowhere special? a bit depressing for my picturesque sensitivities. At the same time I had found the photographic process added a frisson of interest of the chase and spotting new things – more than just I-Spy. And basically that is just how life is much of the time – random, fractured, disordered and much the same. If this series manages to convey that rather than the somewhat more romantic movement of some of my earlier train journey images then it has achieved much of its purpose.

    The Brief

    Produce a series of approximately 12 photographs that are made on, or explore the idea of, a journey. The journey that you document may be as long or as short as you like. You may choose to reexamine a familiar route, such as a commute to work or another routine activity, or it may be a journey into unfamiliar territory. You may travel by any means available.
    Introduce your work with a supporting text (around 500 words) that:
    • Describes how you interpreted this brief.
    • Describes how your work relates to aspects of photography and visual culture addressed in Part Two.
    • Evaluates the strengths and weaknesses of your work, describing what you would have done differently or how you might develop this work further.
    • Identifies what technical choices you made to help communicate your ideas, and also references relevant artists and photographers who have influenced the creative direction of your project.
    • Explains your reasons for selecting particular views, and arriving at certain visual outcomes.

    Reflection
    Just a reminder to look at the assessment criteria again. Think about how well you have done against the criteria and make notes in your learning log.

    Link to preliminary ideas about your critical review (Assignment Four)

    Link to ‘Transitions’ task (Assignment Six).


  • Street Photography Methods

    Shooting from the hip

    Take some time out to develop the technique of shooting very quickly. You’ll probably produce
    some very blurred and even disastrous images, but fortunately mistakes aren’t as expensive
    in the digital age as they were when Winogrand was working the New York streets.
    Produce a set of eight images that demonstrate the life and vibrancy of city living. If you
    don’t live anywhere near a city, choose a spot or a day when there’s a lot going on – the
    busier the better. If you need to, re-read the safety advice in the Introduction to this course
    guide.
    Analyse and reflect on your final images in your learning log or blog:
    • What makes the successful images work well?
    • What difficulties did you experience?
    • How do you feel about this type of work? Is it honest? Are your images a truthful
    representation or did you edit the truth in some way, consciously or sub-consciously?

    Outdoor Portraits

    On a bright day photograph a person in the sunshine. Do this outdoors in three stages.

    1. First, photograph them with your back to the sun. Write down the exposures and look at the issues involved in getting the person’s expression and pose right.

    2. Next, photograph the person with their back to the sun. Write down the exposures. If you can, look at the highlights and the shadow readings given from the spot metering. If you can’t set spot metering then you can still get some indication of the difference in
    brightness. Look to see if there’s burn-out – over-exposure of the hair or black shadow areas without any light at all. The contrast ratio will be very high – what do you think it is?

    3. Take the photograph again but this time use a reflector. Write down the reading that you get from the face and the contrast level.
    A reflector can be aluminum metal foil over a cardboard box. It can be a bed sheet, it can be a fancy professional item; it can be big (2m2) or small (30cm diameter), square or round – it makes no difference. What does make a difference is the quality of the light coming off it.
    To prove this, repeat the third shot with silver (kitchen foil on a board) and then white and note the difference. Put your reflective material on a stand or get someone to hold it for you. In practice, of course, you can use reflectors that already exist – a white wall, for example. Keep your eyes open for possible surfaces.

    • Analyse the differences between the images you’ve made in relation to the exposure you’ve used. Write up your findings with images in your learning log or blog.
    • How much difference has the reflector made?
    • Is there evidence of hard or soft light in this exercise?
    Hollywood-style

    What you do for this exercise will depend on whether you have access to a full set of studio lights and a studio to use them in. If you haven’t, don’t worry – go straight to Part B.

    Part A: If you have lights
    You’re going to create your own version of Hurrell’s Bogart image. Choose someone who might fit the bill, borrow some props (or look in a charity shop), then take a good look at the Humphrey Bogart image and the lighting diagram again.
    Set up the lighting as shown in the diagram. You need a good distance to the background, perhaps about 3m. It should be Black. It is Black when it meters up 5 stops below the face reading for the exposure and not before; at 4 stops, it’s dark grey, at 2 stops it’s light grey.
    Remember you need plenty of space to avoid light bouncing about where it shouldn’t be.

    For your next project you’ll move forward 20 or 30 years to look at the photographic portrait of the 60s, exemplified by the work of David Bailey.
    The light at the back is quite high, coming down on the sitter and washing over the shoulders. Note the shadow on top of the hat front side and the highlight along the top edge and also the light falling over the shoulder in front. All this tells you that the light’s quite high, probably 1m above the sitter. The fill dish indicated is a beauty dish with diffuser. It is straight on here as a fill light.
    Look at the shadow on the collar – that’s what you’re looking to reproduce. The black board indicated is to stop light going directly into the camera lens as this will cause flare and degrade the image. The light front left has a grille on it to stop the light straying around; it puts more light on the front rear shoulder and the left side of the hat image.
    You may need to place a little white card at the opening to bounce the light down a little.
    The light should be above head height. You’ll need a small table lamp with a soft light as the fill light and, if possible, a small off-camera flash gun to provide the left-hand light. This puts more light on the front rear shoulder and the coat area.

    Part B: Without lights
    There are plenty of Hollywood images to choose from. Pick one that you enjoy and can re-create using window light and a small amount of bounced flash. You’ll need a suitable model, preferably someone who is prepared to enter into the spirit of the task!
    The first thing to do is analyse the lighting. Where is it coming from? Look for the deepest shadows for the main light. Then make your own lighting diagram and produce a Hollywoodstyle set of portrait images.
    Produce three images in black and white – 10×12” or A4 at 320 dpi.

  • Beginnings of Photography

    (edited from Wikipedia various)

    The word “photography” was created from the Greek roots φωτός (phōtos), genitive of φῶς (phōs), “light” and γραφή (graphé) “representation by means of lines” or “drawing”, together meaning “drawing with light”.

    Wikipedia links:  History of photography History of the camera

    Several people may have coined the same new term from these roots independently. Hercules Florence, a French painter and inventor living in Campinas, Brazil, used the French form of the word, photographie, in private notes which a Brazilian photography historian believes were written in 1834. Johann von Maedler, a Berlin astronomer, is credited in a 1932 German history of photography as having used it in an article published on 25 February 1839 in the German newspaper Vossische Zeitung. Both of these claims are now widely reported but apparently neither has ever been independently confirmed as beyond reasonable doubt.

    Credit has traditionally been given to Sir John Herschel both for coining the word and for introducing it to the public. His uses of it in private correspondence prior to 25 February 1839 and at his Royal Society lecture on the subject in London on 14 March 1839 have long been amply documented and accepted as settled facts.

    Precursor technologies

    Photography is the result of combining several technical discoveries.

    Pinhole camera or camera obscura: The camera obscura literally means “dark chamber” in Latin. It is a box with a hole in it which allows light to go through and create an image onto the piece of paper. The discovery of the camera obscura that provides an image of a scene dates back to ancient China.  Chinese philosopher Mo Di and Greek mathematicians Aristotle and Euclid described a pinhole camera in the 5th and 4th centuries BCE. In the 6th century CE, Byzantine mathematician Anthemius of Tralles used a type of camera obscura in his experiments, Ibn al-Haytham (Alhazen) (965–1040) studied the camera obscura and pinhole camera. Renaissance painters used the camera obscura which, in fact, gives the optical rendering in color that dominates Western Art. Leonardo da Vinci mentions natural cameras obscura that are formed by dark caves on the edge of a sunlit valley. A hole in the cave wall will act as a pinhole camera and project a laterally reversed, upside down image on a piece of paper.

    Methods of reproducing and fixing the image: Silver Nitrate and Silver Chloride: Albertus Magnus (1193–1280) discovered silver nitrate,[12] and Georg Fabricius (1516–71) discovered silver chloride. Techniques described in the Book of Optics are capable of producing primitive photographs using medieval materials. Daniele Barbaro described a diaphragm in 1566. Wilhelm Homberg described how light darkened some chemicals (photochemical effect) in 1694. The fiction book Giphantie, published in 1760, by French author Tiphaigne de la Roche, described what can be interpreted as photography.

    The first success of reproducing images without a camera occurred when Thomas Wedgwood, from the famous family of potters, obtained copies of paintings on leather using silver salts. Since he had no way of permanently fixing those reproductions (stabilizing the image by washing out the non-exposed silver salts), they would turn completely black in the light and thus had to be kept in a dark room for viewing.

    First camera photography (1820s)

    Photography as a usable process dates to the 1820s with the discovery of chemical photography. The first permanent photoetching was an image produced in 1822 by the French inventor Nicéphore Niépce, but it was destroyed in a later attempt to make prints from it. Niépce was successful again in 1825. He made the View from the Window at Le Gras, the earliest surviving photograph from nature (i.e., of the image of a real-world scene, as formed in a camera obscura by alens), in 1826 or 1827.
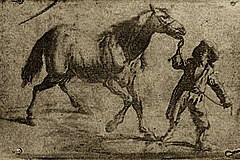
    Earliest known surviving heliographic engraving, 1825, printed from a metal plate made by Joseph Nicéphore Niépce with his “heliographic process”. The plate was exposed under an ordinary engraving and copied it by photographic means. This was a step towards the first permanent photograph from nature taken with a camera obscura, in 1826.

    Because Niépce’s camera photographs required an extremely long exposure (at least eight hours and probably several days), he sought to greatly improve his bitumen process or replace it with one that was more practical. Working in partnership with Louis Daguerre, he discovered a somewhat more sensitive process that produced visually superior results, but it still required a few hours of exposure in the camera. Niépce died in 1833 and Daguerre then redirected the experiments toward the light-sensitive silver halides, which Niépce had abandoned many years earlier because of his inability to make the images he captured with them light-fast and permanent. Daguerre’s efforts culminated in what would later be named the daguerreotype process, the essential elements of which were in place in 1837. The required exposure time was measured in minutes instead of hours. Daguerre took the earliest confirmed photograph of a person in 1838 while capturing a view of a Paris street: unlike the other pedestrian and horse-drawn traffic on the busy boulevard, which appears deserted, one man having his boots polished stood sufficiently still throughout the approximately ten-minute-long exposure to be visible. Eventually, France agreed to pay Daguerre a pension for his process in exchange for the right to present his invention to the world as the gift of France, which occurred on 19 August 1839.
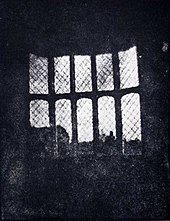
    A latticed window inLacock Abbey, England, photographed by William Fox Talbot in 1835. Shown here in positive form, this may be the oldest extant photographic negative made in a camera.

    Meanwhile, in Brazil, Hercules Florence had already created his own process in 1832, naming it Photographie, and an English inventor, William Fox Talbot, had created another method of making a reasonably light-fast silver process image but had kept his work secret. After reading about Daguerre’s invention in January 1839, Talbot published his method and set about improving on it. At first, like other pre-daguerreotype processes, Talbot’s paper-based photography typically required hours-long exposures in the camera, but in 1840 he created the calotype process, with exposures comparable to the daguerreotype. In both its original and calotype forms, Talbot’s process, unlike Daguerre’s, created a translucent negative which could be used to print multiple positive copies, the basis of most chemical photography up to the present day. Daguerreotypes could only be replicated by rephotographing them with a camera.[21] Talbot’s famous tiny paper negative of the Oriel window in Lacock Abbey, one of a number of camera photographs he made in the summer of 1835, may be the oldest camera negative in existence.[22][23]

    John Herschel made many contributions to the new field. He invented the cyanotype process, later familiar as the “blueprint”. He was the first to use the terms “photography”, “negative” and “positive”. He had discovered in 1819 that sodium thiosulphate was a solvent of silver halides, and in 1839 he informed Talbot (and, indirectly, Daguerre) that it could be used to “fix” silver-halide-based photographs and make them completely light-fast. He made the first glass negative in late 1839.

    In the March 1851 issue of The Chemist, Frederick Scott Archer published his wet plate collodion process. It became the most widely used photographic medium until the gelatin dry plate, introduced in the 1870s, eventually replaced it. There are three subsets to the collodion process; the Ambrotype (a positive image on glass), the Ferrotype or Tintype (a positive image on metal) and the glass negative, which was used to make positive prints on albumen or salted paper.

    Many advances in photographic glass plates and printing were made during the rest of the 19th century. In 1884, George Eastman invented an early type of film to replace photographic plates, leading to the technology used by film cameras today.

    In 1891, Gabriel Lippmann introduced a process for making natural-color photographs based on the optical phenomenon of the interference of light waves. His scientifically elegant and important but ultimately impractical invention earned him the Nobel Prize for Physics in 1908.
  • Art Photography: My current position

    Take a look at these pieces of art work, some or all of which you might have seen before.
    Write down your thoughts about each one. Try to answer the following questions:
    • What do you think was the artist’s intent?
    • What does the image make you feel? Does it create any questions or conflicts in your mind?
    • Why do you think the artist has chosen to work in this way?
    • Is this art?
    You might want to do some background research, but make some preliminary notes based on the works themselves first before attempting to find out more about them.

    The pieces are:

    A My Bed, Tracey Emin
    www.saatchi-gallery.co.uk/artists/artpages/tracey_emin_my_bed.htm

    B Convergence, Jackson Pollock
    www.kaliweb.com/jacksonpollock/images/art/convergence.jpg

    C Hell, Jake and Dinos Chapman
    http://lpbrull.home.xs4all.nl/digipage/digipage/HELL/hell_overview.htm

    D Bram Stoker’s Chair, Sam Taylor-Wood
    www.chairblog.eu/2010/08/10/bram-stokers-chair-series-by-sam-taylor-wood/

    E Cremaster, Mathew Barney
    www.cremaster.net/#

    Write a short review (no more than 250 words) of each work and its relevance to your practice (if any) in your learning log or blog. Return to this exercise later in the course to see if your thoughts are the same of if your position and your practice have changed.

  • Exercise: Artistic Styles

    Write up to 150 words about an issue that you feel worthy of comment. It can be immigration, finance, social deprivation, domestic violence or any contemporary issue that you feel strongly about. Then make an image that expresses your concerns in one of the three artistic styles listed below. This is not an easy task and you may have to do some research before you start.

    Once you’ve completed your first image, have a go at a second image in another style. Try and make time to attempt the third style – or at least make some notes outlining how you’d go about it. You could then come back to this exercise later and put your ideas into practice.

    Constructivist: Produce a composite image from several images that you feel fully express your argument or position.

    Surrealist: From the same position statement, produce an image based upon surrealist notions of how the issue stands from your position. Why or how do you affect the issue? Is it ‘unconscious’ – just instinct that things should be different – or is it ‘repressive’ in order to provide what you see as a natural order of things? Produce an image that delivers your feelings from a surrealist viewpoint. (Re-read pp.281–82 in your reader if you need a reminder about what these terms mean.)

    Conceptual: The issue you’ve written about may be able to furnish you with a concept. Try making a précis of it in about 15 words. Once you’ve realised your concept, plan a way of expressing this in an image. Think in either a literal or non-literal manner – logically or illogically. Anything goes provided that your methodology visually supports the concept and the idea is illustrated through the imagery.

    Write the three tasks up in your blog alongside illustrations of constructivist, surrealist and conceptual photography you used as research for your image-making.

  • Exercise: Photography as Illustrative Art

    Choose a famous or favourite piece of narrative poetry. Use this to develop a set of illustrative images that express the sentiment and actions within the poem. You’ll find this exercise easier if you choose a poem that gives you plenty to work with, for example Tennyson’s ‘The Lady of Shalott’.
    Produce a set of three images that illustrate:
    • the start
    • the main story
    • the end.
    Type the poem out and use the images to illustrate it within your blog or learning log.
    Choose your font with care. It’s important to choose a font that is visually appropriate not just anonymous.

  • Loretta Lux

    Loretta Lux specialises in photographs of children, often children of her friends, with the occasional adult or self-portrait. A former painter, Lux, 38, pays attention to form, shape and colour. “I don’t care about traditional photography I want more control.” The images, which can take up to a year to complete, are less about the subjects than they are a metaphor for the idea of childhood. “I want people to decide what to see,” she says. Whatever they do decide, they’re not likely to forget it.

    Her portraits are carefully controlled at every stage of production:

    • The formality of the poses she selects at the shooting stage, often using vintage outfits, including some of Lux’s own childhood things.
    •  Digital adjusted features: Elongated limbs, oversized heads, and eyes spaced just a little farther apart than average contribute to the strangeness of their cool gazes and isolated locations.
    •  Merging the subjects with their settings: she strips out the background and replaces it with a quiet setting–a grassy field, an abandoned building–either painted by Lux or taken from her photographs of various European landscapes and interiors. Then she erases any object that crowds the picture, like a tree or toy, so the child appears to be part of a dream.
    •  Using a narrow pastel palette in the final prints.
    •  The final images are produced as luminous Ilfochrome prints.

    Loretta Lux was born in 1969 in Dresden, Germany. She studied painting at Akademie der Bildenden Künste, Munich from 1990 to 1996. She began photographing in 1999 and produces about half a dozen finished pictures each year. Solo exhibitions of her work have been held at Yossi Milo Gallery, New York; Hague Museum of Photography, The Hague; and Torch Gallery, Amsterdam. Her photographs have also been featured in exhibitions at the National Museum of Modern Art, Tokyo; Australian Centre for Photography, Sydney; Art Institute of Chicago; and at the Museum of Contemporary Photography in its 2006 exhibition In Sight. She is the recipient of a Bayerischer Kunstförderpreis (2002) and The International Centre of Photography’s Infinity Award for Art (2005).

     Read more